Friday, 3 July 2009
Photoshop - playing with images
I'm going to play arround with a photo, which I want to include on my MySpace profile.
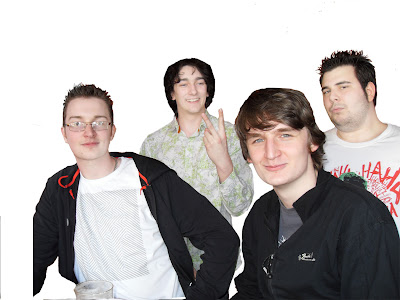
The original image I took was in the Royal London, of a group of students enjoying a pre-lecture pint...

The first thing I want to do, is get rid of the background, so I use the magic erraser for the most part of it, and zoom in to quite a deep zoom and go round the edges with the eraser tool.
Being colourblind, I find it difficult to differentiate between red and brown, so I've givem some of the people in it a hair cut.

Please excuse the kitchen curtain that the second person is waring as a shirt.
I decide that the first person in the photograph is too far away, makeing the image wide, so using the magnetic lasso tool, i select arround him, and then move him closer to the others.
Next, I want to give them a nice gradient background, so I create a new layer, and then using the gradient tool, fill the entire layer with the effect, and finally placing the layer at the very back of the image.

I now want to add some descriptive text in the background, so using the text tool, I write some text and position the text later infront of the background layer, but behind the photo layer.

Now, I rotate the text, so it looks more appealing...

Now, to make the text stand out more, I add a 5pixel white outline, known as a stroke in Photoshop...

In attempt to hide the hard edges from the original photo, I give the people a white glow, using the blending options.

Now I reposition the original image and the text...

And then I crop the image...

I decide that I'm not happy with the current background selection, so I use the gradient tool again to recolour the background later...

Now, not happy with the hand jesture the second person is displaying, I decide to add a book, so it looks like he's reading it. I find an image of a book that I want, and cut arround it using the magic eraser and then going round it at a close level of zoom with the normal eraser tool.
I also use the magnetic lasso tools to go round his hand, and create a copy of it on a new later at the front, so the hand becomes infront of the book, but the rest of the image stays behind the book.
I also resize and skew the image of the book to fit in with my image.
Finally, I want an embossing effect on the text, so I use the blending tools agian to ajust the bevel effects.
I've finally reduced the size of the image, so it's a smaller file-size and fits neatly in to the MySpace profile...
Now that I'm happy with this image, I'm going to upload it to flickr and insert it on to my MySpace profile...
Thursday, 2 July 2009
YouTube - Setup and upload
Setting up a YouTube account was supprisingly easy, although it did have a moan about me already having an account, but after signing out of Gmail, it allowed me to set up a fresh account.
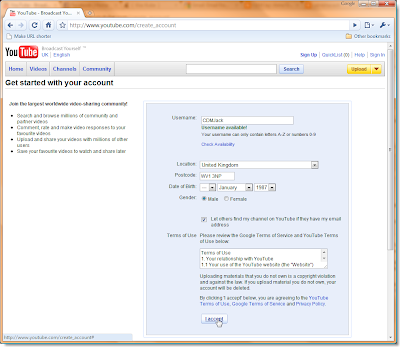
It asked me for a username, a location (inc post code), date of birth and my gender, why would you tube need to know my gender I wonder?
I clicked accept, after reading the terms and conditions like everyone else does...
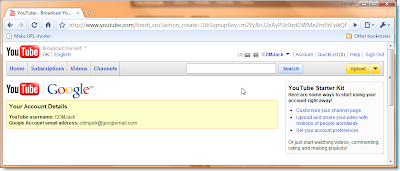
This is the supprising bit, because I was already signed in to Gmail, it stole all my other details from that service, and that was it, with one click on that accept button, I was signed up to YouTube!
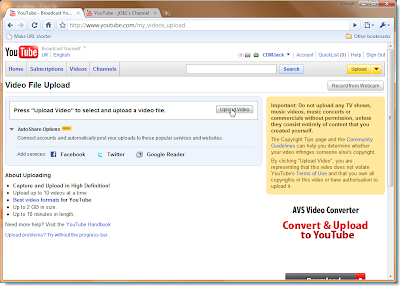
Now, On to uploading a video. I selected an 18MB video I created for a college project in 2004. It's the only video I have that isn't cringe-worthy.
To upload, I click the yellow "upload" button at the top right of _every_ youtube page.
After selecting Upload Video, I'm presented with a File dialog, which I locate the video file.
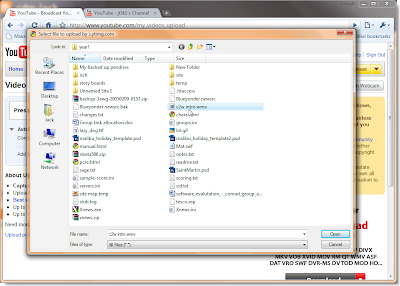
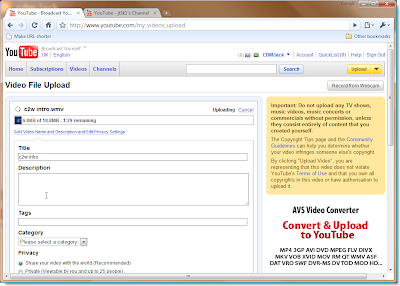
Once I click open, with a bit of AJAX wizardry, the video file imediatly starts to upload to the youtube service. Whist the file is uploading, 18MB in 1 and a half minutes, it allows me to enter a title and description for the video, aswell as select a catagory, tags and privacy options.
Once the video has been uploaded, and processed the page redirects me to the video's page, which gives me a variety of options, including anotation. Unfortunatly, the audio track in the video has been flagged as copyright material by YouTubes automatic protection, but still allows us to view the video, just with no audio.
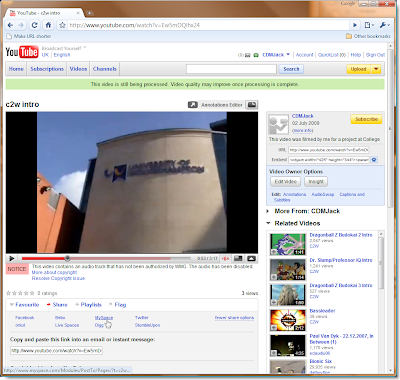
From this page, I can embed the video in my MySpace profile. To do this, I click the "share" button, and then select "MySpace". This opens this page up, in a new window.
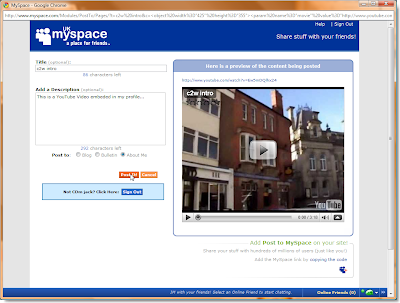
I give it a quick description, and click "post it", as I'm already signed in to MySpace on this browser session, I don't have to login first.
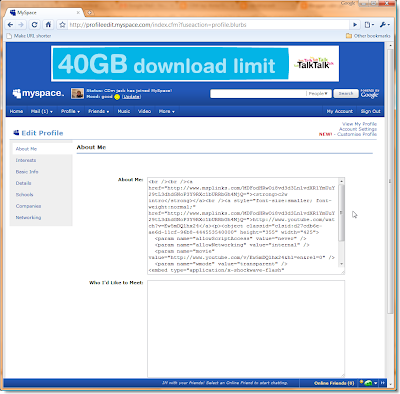
This pretty much does the same as using the embed HTML code, and pasting it in to your profile, as seen by looking at the "about me" edit options....
Setting up a MySpace account...
I find this to be somewhat of a tedious task, as their site is not the most user friendly, and takes a while to load each step.
Anyhow, We go to MySpace.com and click Sign up, which presents us with this page.
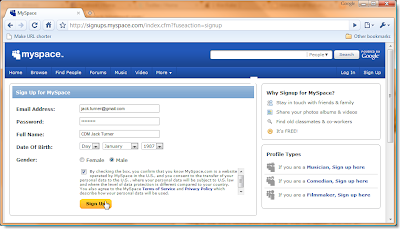
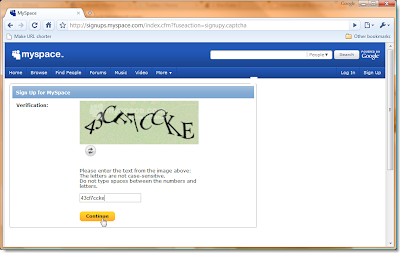
I use my Gmail account to sign up, then fill in the rest of the details, and click Sign up. You'd have thought this is all that is required to join this site, but no wait, there's more! It want's to know if I'm a real person, by preseting me with an image with letters and number, which it wants me to copy in to the box below it...
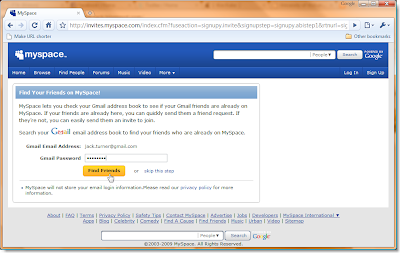
I click continue, and it detects that I've used a Gmail account to sign up, and asks me for my password, to see who else I know that is on MySpace, so that we can become "friends".
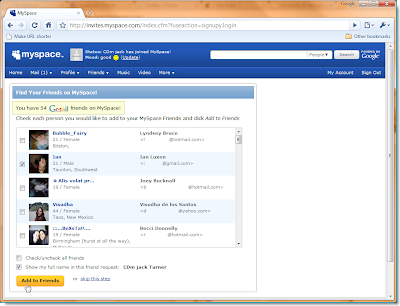
I am then presented with a list of my friends that have MySpace accounts, I only select one to use as an example, and click "Add to friends"
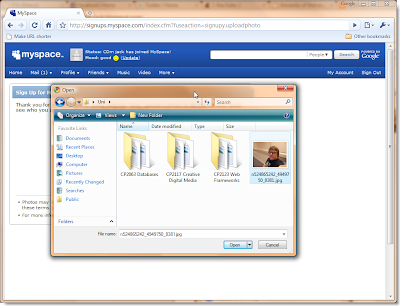
Next it asks me for a photograph...

So I give it one of my favourite mug-shots and click upload, I hope I don't break it!
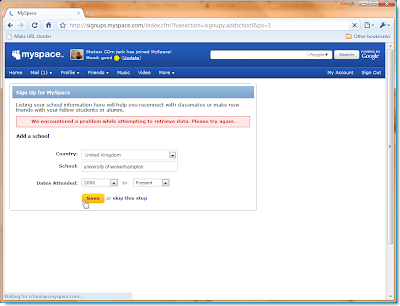
It now asks me what school's I've been to, I give it "University of Wolverhampton" and click save, this gives me an error message, so I decide to skip this step.
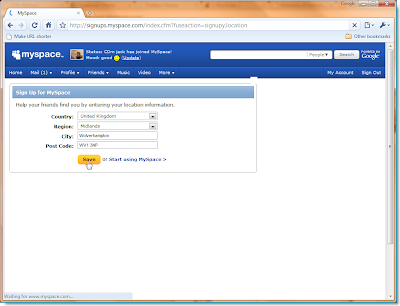
It now want's to know where I live! - Giving in to it's demands, I enter my location details...
Expecting the next screen to ask me for a credit check, to my supprise I finally see the home page!
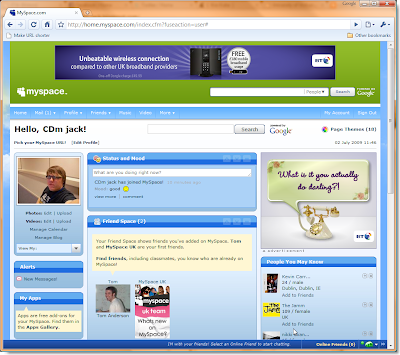
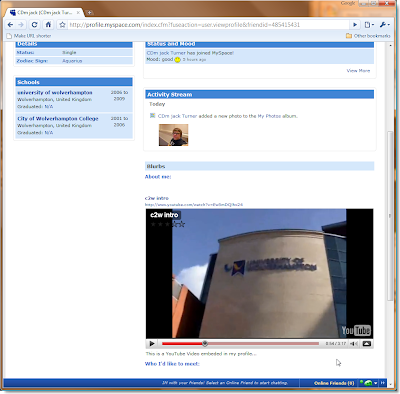
It's already given me two friends, and already assumed that I'm in a good move, I click profile to see what my new profile looks like...
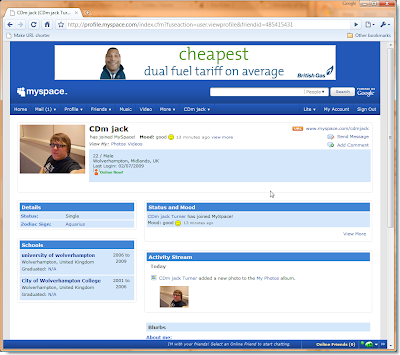
Dispite it giving me an error message when I tried to enter my school, it has managed to save them anyway. It's also assumed that I'm Single, worked out my star-sign from my date of birth, and still assumes that I'm in a good mood.
This concludes the sign up process to set a MySpace account up.
Setting up a blog...
In order for me to blog the progress of this assessment, I obviously need a blog, so here is how I set this particular one up.
As I already have a blogger account, I sign in with one of my Google accounts.
Once signed in, I am presented with what is known as the "dashboard", accessible from the "Dashboard" hyperlink at the top of every page.
I now click on "Create a Blog" under the Manage Blogs section of the page.

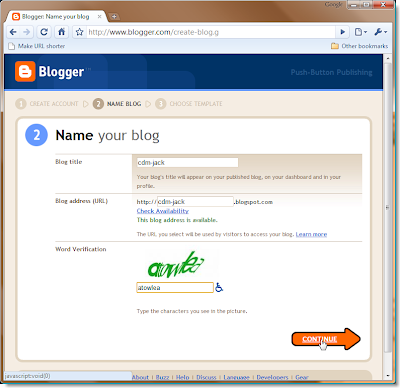
I fill the page it presents me with, with my information for the blog, in this case, I give it the title cdm-jack and the url of http://cdm-jack.blogger.com which it informs me is avaliable. Once filling in the word verification (to prove that I'm human and not an automated bot), I click Continue.
The next screen asks me to select a template, which I can change later, but for now, I decide to choose a simple one.

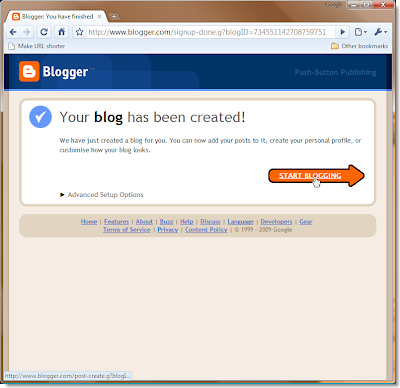
I click continue and the website informs me that I've finished setting up my new blog, and it's ready for me to "start blogging", so I follow it's instructions.
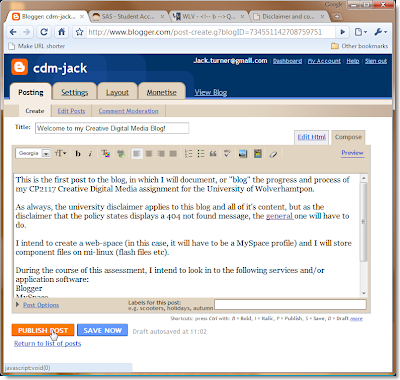
I am now presented with a screen to create a blog post/entry. I write my introduction on this page and click "publish post".
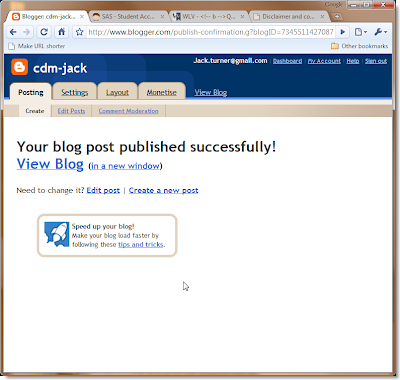
Which goes to a confirmation page, confirming that I've sucessfully made my post.
 The result being the following screen, which is presented to anyone who views the blog on the web.
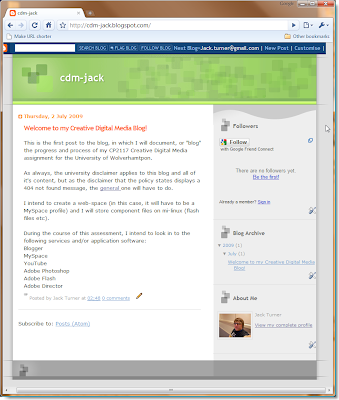
This concludes setting up and posting to a blog.
There are hundereds, if not, thousands of blogging services and software out in the wild (on the web for free), my favourite being Posterous.com, which "auto-posts" anything I send to it on the web or by email, to my Facebook, MySpace, Twitter, Blogger and Flickr accounts at the click of a button, and Posterous is closely followed by Twitter.
Welcome to my Creative Digital Media Blog!
This is the first post to the blog, in which I will document, or "blog" the progress and process of my CP2117 Creative Digital Media assignment for the University of Wolverhamtpon.
As always, the university disclaimer applies to this blog and all of it's content, but as the disclaimer that the policy states displays a 404 not found message, the general one will have to do.
I intend to create a web-space (in this case, it will have to be a MySpace profile) and I will store component files on mi-linux (flash files etc).
During the course of this assessment, I intend to look in to the following services and/or application software:
Blogger
MySpace
YouTube
Adobe Photoshop
Adobe Flash
Adobe Director
Subscribe to:
Posts (Atom)
